Category Archives: Managing the Don’t Shoot Yet

IN EXTREMIS COMMUNICATION, PART 4   

Why would we ever make the decision to hold onto, or pin, a potentially violent criminal? As a civilian, we have no responsibility to arrest or detain a criminal. To the contrary, as exposure increases, risk and danger increases.

To catch up, please read the first three parts of this series:


In Extremis Communication, Part 1


In Extremis Communication, Part 2


In Extremis Communication, Part 3


Exposure increases risk for the criminal and it increase risk for the armed citizen.

For the criminal, the less exposure, the less transfer of evidence, the less chance witnesses can observe the crime, and the faster they could get away.  More exposure equals more chance of getting caught. A criminal wants to get in and out as fast as they can. They want to get “paid” and get out. The more exposure (time) the greater chance something could go wrong.

The same is true for an armed citizen in an armed encounter. Pinning a subject in place, increases the time an armed citizen spends with a subject.

When I use the term “pinning in place” I mean, restricting the subject’s movement and directing them them into a position of extreme disadvantage. This does not mean we are physically pinning the subject with our bodies. A common police practice is to prone a suspect, face down on the ground. A prone suspect retains the ability to use their arms and legs and could propel themselves up or forward explosively. We want to restrict the subject’s ability to move explosively. Later in this article I will describe an effective method to pin a person.

Time spent focusing on one subject takes away from time spent securing yourself and loved ones and does not allow you to look for other potential threats within the environment. By necessity, we need to focus on the subject we can see and regularly scan our environment for additional threats.

Multitasking in dangerous environments is not ideal.  

As time passes, the criminal has more time to plan counter attacks or use threats or coercion to attempt to get out of the situation or turn the tables.

So why would we ever attempt to pin a criminal in place and not just move him out of our immediate environment (In Extremis Communication, Part 3 – Moving a subject at gunpoint)?

  1. When we visually clear the subject’s waistline we observe a firearm. By moving the subject we potentially give him/her time and distance to draw the firearm. Additionally, once the subject leaves our line of sight, they may arm themselves and circle back.
  2. The subject has penetrated into our environment far enough to bypass occupied areas or other innocent people and we would have to move the subject past them to get the subject out. Imagine moving a subject towards an exit portal only to have him jump into your daughter’s bedroom.
  3. For whatever reason you have decided moving the subject out of the area is dangerous. The exposure risk is less than the risk of moving the person.

We have already covered how to

STABILIZE A COMPLIANT SUBJECT:

  1. Order the subject to stop movement:  DON’T MOVE.
  2. Order the subject to move his hands away from his waistline:  HANDS UP.
  3. Order the subject to turn away from you one step at a time. You stop them when they are facing away from you: WHEN I TELL YOU TO MOVE, I WANT YOU TO START TURNING ONE STEP AT A TIME. MOVE.
  4. Expose waistline and impair subject’s vision: REACH BACK AND GRAB THE COLLAR OF YOUR SHIRT, NOW PULL THE SHIRT OVER YOUR HEAD.
  5. Visually clear the subject’s entire waistline:  WHEN I TELL YOU TO MOVE, I WANT YOU. TO TURN AROUND, SLOWLY, ONE STEP AT A TIME…DO IT NOW.
  6. Direct the subject to move the subject, in a circle, 540 degrees so the subject stops facing away from you.

And, how to move them.

STEPS TO MOVE THE SUBJECT:

  1. “I am going to move you to the door and let you run. If you do not follow my instructions or attempt to turn around and hurt me or my family, I will shoot you.  When I tell you to, I want you to move one step at a time”.  
  2. “Step forward one step, do it now”.
  3. “Step forward one step, etc.”

PINNING A SUBJECT IN PLACE:

  1. Pick an appropriate place to pin the subject. You may need to move the subject from where you had them stop.  Move them one step at a time until they are in the exact place you want to pin them.
  2. If the subject is not facing away from you have them face away from you one step at a time:


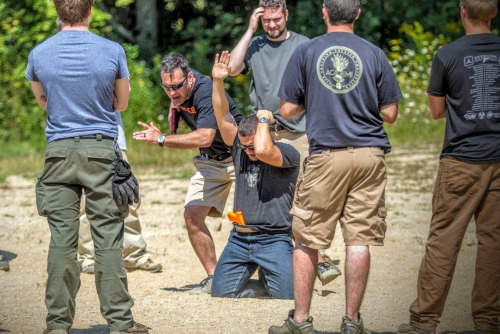
Subject is told: Don’t Move and ordered to put his hands up.  He is then ordered to raise his hands even further.  Notice that in this picture Matt’s hands are up but we still can’t see his waistline. Now turn the person away from you by having them move one step at a time.

IMG_20160121_081134.jpg

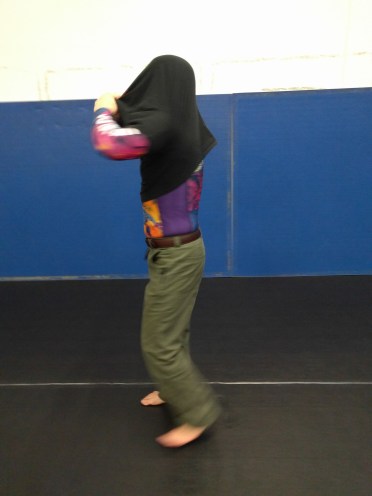
The subject is now ordered to grab the  back collar of his shirt with both hands (front view for clarity).

IMG_20160121_081143.jpg

And, pull the shirt over his head:

IMG_20160121_081154.jpg

Now we have a clear view of the subject’s waistline.

We then order the subject to turn, one step at a time, 540 degrees, so when he stops, he is facing away from us.

IMG_20160121_081156.jpg

IMG_20160121_081157.jpg

The decision is now made to either move the subject or pin them in place.
If we decide to pin in place, we order the subject to get down on one knee. Then the other knee:

IMG_20160121_081240.jpg
We now order him to cross his ankles:

IMG_20160121_081244.jpg

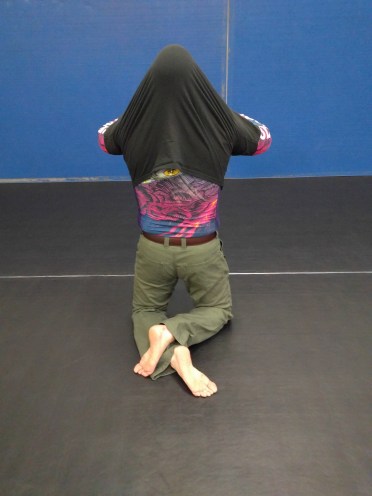
Each step in this process progressively restricts the subject’s ability to move.

We order the subject to sit back on his ankles.

We now order the subject to bend over and put his head on the floor:

IMG_20160121_081311.jpg

(I am not responsible for Matt’s choice of rash guard! He had just completed training Brazilian Jiu Jitsu and is apparently very comfortable with bold colors).

The subject’s movement is fully restricted. You are behind him and can observe him fully. His visual field is obscured.

If the police have not been called or you are alone, this would be the time to call, while still covering the subject with your firearm. Follow proper protocols for a police response and exactly and calmly explain the circumstances.

You have three choices when faced with a potentially dangerous threat, when you have a firearm in hand and the subject complies to your initial order to stop moving:

  1. Shoot to stop the subject from potentially injuring or killing you or others.
  2. Move the subject out of the area, essentially letting them escape.
  3. Pin the subject in place.

All tactics, techniques, and procedures should be trained extensively and ultimately under live, full contact, resistance.


5 Comments

Filed under Managing the Don't Shoot Yet, Tactical Communication

IN EXTREMIS COMMUNICATION, PART 3


gadget_show_fps_simulator_screen2

To review parts 1 and 2:

In an armed encounter with an apparently unarmed and complaint subject:

Ideally from a position of cover:

  1. Order the subject to stop movement:  DON’T MOVE.
  2. Order the subject to move his hands away from his waistline:  HANDS UP.
  3. Expose waistline and impair subject’s vision: REACH BACK AND GRAB THE COLLAR OF YOUR SHIRT, NOW PULL THE SHIRT OVER YOUR HEAD.
  4. Visually clear the subject’s entire waistline:  WHEN I TELL YOU TO MOVE, I WANT YOU. TO TURN AROUND, SLOWLY, ONE STEP AT A TIME…DO IT NOW.
  5. Direct the subject to move the subject, in a circle, 540 degrees so the subject stops facing away from you.


MOVING THE SUBJECT


In numerous circumstances, the safest thing an armed person could do is let the subject escape.  The more time that’s  spent with the subject, the more things could go wrong.

This is not an option for an on duty police officer. A police officer’s objective is to take the suspect into custody.  In order to complete the goal, the officer has to expose himself/herself to risk.  They have to holster and secure their firearm, close range with the suspect, reach for and manipulate handcuffs, grab the subject’s arm, handcuff, search, and transport the subject.  Every step of this process has potential pitfalls and exposes the officer to attack.

For a citizen, allowing the subject to run away, in a specific way and under specific circumstances, may be the best option.

People who commit crimes, especially violent crimes. are usually not calm, cool, and collected.  Often times they are high, drunk, and stupid. They may also be, experienced, brutal, and acclimated to violence. Most experienced violent criminals could read your anxiety and inexperience and, given time, will figure a way to use it against you. We could counter this with realistic training with realistic resistance under stress, proper mindset, and experience.  We can also limit our exposure to the criminal by allowing him to leave.

Once a criminal encounters an armed citizen, they will have a stress response.  Their vision may tunnel, things may slow down, they will sweat, heart rate and blood pressure will elevate.  This stress response may make it hard for them to understand commands.  Our commands need to be simple and concise.

Once things slow down and the stress response begins to dissipate, the subject might start thinking of ways to get out of the situation he is in. Clearly, he does not want to be shot but he also does not want to spend time in jail. The subject matter expert for Violent Criminal Actors is William Aprill.  William and Paul Sharp co-teach an excellent class called Unthinkable which covers all aspects of criminal behavior and direct response to aggressive criminal action.

The longer you are exposed to the subject, the longer he has to start thinking of escape or attack plans.  It also exposes you to visual and physical fatigue.  The subject may attempt to engage you or your family in conversation to delay your response time which offer him advantage.

Your number one priority is your family and your safety, not the apprehension and conviction of a criminal.

With this priority in mind, we may make the decision to move the subject to our doorway or away from our area and let him run away.

As a general rule, if you are moving the subject towards you, you should have him walk backwards.

If you are moving the subject away from you, you should have him walk forwards. In other words, you are always behind the subject, not allowing him to get a visual fix on your location.

The subject should be moved one step at a time. Remember, if we followed the steps correctly, the subject’s shirt is pulled over his head and his vision is compromised.  You are his guide and if he is compliant, he will follow every command.

The decision to move the subject or pin them in place rides on numerous factors.

  1. Will you move the subject past open doorways with family members in the rooms. Children may peak out of doors and get between you and the subject. Children or adults may stand in the doorway and get grabbed by the subject and used as a shield.  Or, the subject may run into a room and break visual contact.  If this is the case the better decision would be to pin the subject in place.  Is it safe to you, your family, and innocent bystanders to move the subject?
  2. Did you observe a weapon on the subject?  If you did, letting them walk might offer them an opportunity to access the weapon.  When they leave, they may circle back with the weapon and use it as you let your guard down.
  3. Are they close to an exit?  If they are, it’s easier to move them out of the structure and out of the area.

STEPS TO MOVE THE SUBJECT

    1. I am going to move you to the door and let you run. If you do not follow my instructions or attempt to turn around and hurt me or my family, I will shoot you.  When I tell you to, I want you to move one step at a time.
    2. Step forward one step, do it now.
    3. Step forward one step, etc.

We will do this until we walk the subject out of the immediate area or out of our residence.

Now, we do not want to just let the subject run free.  He may decide to go to a car and get a weapon, he may decide to run back towards us.  So we give the subject a goal and tell him to run to that goal.

4. See that street lamp?  When I tell you to, I want you to run towards the street lamp and keep running down the street.  The police are coming and this is your opportunity to get away.  I will be watching you the entire way, if you do anything I think is threating, I will shoot you.  Now RUN!

We do not want to let our guard down. After the subject has left the area, we still want maintain vigligence. If police are responding, secure yourself and your family and holster your firearm.  If you could leave the area, leave.

While leaving the area of conflict you should perform countersurveillance measures, ensuring no one following you. If you are meeting police to report the incident, meet them in a well lit populated area.

In the next article in this series we will describe a technique to pin the person in place.

7 Comments

Filed under Managing the Don't Shoot Yet, Tactical Communication

IN EXTREMIS COMMUNICATION PART 2

263524276.jpg

Image credit:  RIA Novosti, Mikhail Mordasov

STABILIZE


In Part 1 we discussed the initial step to deal with a verbally compliant subject, when you have a firearm pointed at them. We use a decisive, clear, and “alpha” command to freeze the subject’s movement. The command of:


DON’T MOVE!


meets all of our criteria.  It is simple, concise, and understandable.  It also allows us to evaluate if the subject will be compliant to our verbal commands.  


If at any time the subject becomes a lethal threat, you could always shoot him.


Assuming the subject freezes and follows your verbal command of “don’t move”, our next step is to stabilize the subject.  Stabilization describes a step by step process to move the subject into ever increasing position of disadvantage while visually clearing the subject for weapons.  Every movement instruction we give needs to be clear and concise.


We need to focus on the subjects hands.  Hands carry weapons. Hands can hurt you. This is the reason police officers get nervous if they can’t see your hands during any interaction.


The next step in the stabilization process is to get the subjects hands away from their waistline and confirm they do not have a weapon in their hand(s).  The next verbal command is:


HANDS UP


Most people who carry weapons, carry them on their waistline, usually around or near their center of gravity, from the hip points forward.


The waistline has numerous advantages for weapons carry and concealment.  It is stable, even during movement, it allows for concealment with shirts and jackets, it offers a stable structure to secure a weapon (belt or pockets), and it is easy to reach from a seated or standing position.  Additionally a forward of the hip point carry allows for a smooth draw of the weapon, even under less than ideal circumstances.  


Additionally, reaching towards the waistline for a weapon could be masked by common everyday movements like placing hands into pockets. Therefore most criminals, law abiding citizens, and law enforcement officers carry their weapons at their waistline.


In summary, our first priority, after stopping the subjects movement, is to see their hands and confirm they are not holding a weapon. We then instruct them to move their hands as far away from their waistline as possible.


We want the subject’s hands as high in the air as possible. This accomplishes two objectives.


It places the subject in a vulnerable position where aggressive movement is difficult; and


it will usually expose the subject’s waistline.


Stand up now and reach your hands as high up in the air as you could.


Were your palms facing forward? They probably were.


Did your fingers naturally spread apart? They do for most people.


What would you have to do to attack someone? The first thing you would do is lower your arms. It’s difficult to generate forward momentum with your hands stretched into the air.


This accomplishes numerous objectives in the stabilization process. We want to see the subject’s palms. We want to place the subject at a positional disadvantage and make movement difficult.


Most of you also noticed your shirt rode up over your waistline. If it didn’t ride up, it got tighter around your waistline, tighter for some more than others!


This allows us an initial visual clearing of the waistline for concealed weapons. We are looking for guns, knifes, clips on the subject’s pockets, or any bulky object.


If we see a weapon we will tell the subject we see the weapon and if he reaches for the weapon we will shoot him.


Once we have visually cleared the front of the subjects waistline, we need to clear the back of the subjects waistline. We are also going to continue to put the subject in a more disadvantaged position.


EXPOSE THE WAISTLINE FOR VISUAL CLEARING


We now want to raise the subjects shirt or jacket higher, to expose the waistline further, and impair the subject’s vision.


We can accomplish this by having the subject reach behind his head, grab his shirt at the collar, and pull the collar of his shirt over his head. The commands we use are:


REACH BEHIND YOUR HEAD AND GRAB YOUR SHIRT.


PULL THE COLLAR OF YOUR SHIRT OVER YOUR HEAD.


DON’T MOVE.


The subject’s hands will remain on his head from this point forward and we will continue to observe his hands. If his hands stray from his head, we raise our voice and order him put his hands back on his head.


We now instruct the subject to begin to slowly turn around, one step at a time.


WHEN I TELL YOU TOO, I WANT YOU TO BEGIN TO TURN, ONE STEP AT A TIME.


DO IT NOW.


When the subject begins to turn observe his waist line for weapons. Control the speed of the subjects turning with voice commands. You could have the subject stop at any time.  We want to subject to turn 540 degrees.  


In other words, the subject starts by facing you, you then turn the subject around once, so he is facing you again and then have him continue to turn until he is facing away from you.  From this point forward, we don’t want the subject to see us or get a visual fix on our location.


If he cannot see us he cannot orient to us and it makes it very difficult for him to attack us.


We now need to make the decision to


MOVE THE SUBJECT or


PIN THE SUBJECT IN PLACE.


We will cover moving or pinning in Part 3 of this article series.  


Let’s take a step back and talk about our own actions.


COVER


If at all possible, we should be behind cover.  Cover means you are behind an object or structure which will stop incoming rounds.  Our weapon is up and pointing at the subject.  Our finger is, ideally, at ejection port register (your trigger finger is resting on the ejection port).  Your trigger finger needs to be off the trigger and at least resting on the slide.


APPROPRIATE COMPRESSION AND EXTENSION OF FIREARM ALONG THE HORIZONTAL LINE OF PRESENTATION


Our weapon is appropriately compressed or extended along the vertical line of presentation.


  • This means, if you are close to the subject your arms should be compressed into your chest, the farther away the subject is the more extended your arms could safely be.
  • We do not want the horizontal plane of our arms and our firearm to block our ability to see the subject’s waistline.
  • Holding the weapon out at full extension will become fatiguing, quickly.  The closer the pistol is to our center of mass, the less fatiguing.
  • We can shoot at any time in the horizontal line of presentation.  Of course the closer the pistol is to our body, the less we rely on sight picture and the more we rely on body mechanics to keep the pistol pointed at the subject.


VOLUME AND PITCH OF OUR COMMANDS


We often observe students shouting commands during training.  This is partly due to the stress of the training and partly to impart how important the commands are.  Think about the last time you were yelled at. Did you feel like following the yellers instructions or did you feel like fighting back?


Yelling or barking orders is effective when it is sudden and outside the volume of normal interaction.  We should establish a calm modulated vocal volume and pitch.  All orders should be slow clear and calm.  Only when the subject does something we don’t want them to do or intentionally disobeys a command should we raise our volume and tone.  


Use your voice as a weapon.


If we give the command of “hands up” and the subject does not immediately comply, we then raise the volume and tone of our voice to HANDS UP!!!!  The sudden change often triggers an adrenaline surge in the subject and may induce an acute stress response.


Establish a calm, slow, and controlled vocal baseline, only stray from the baseline when you need immediate compliance, when you achieve compliance drop your vocal volume and tone back to baseline.


DON’T USE THE WEAPON AS A POINTER


Another action we see during stress is students using the firearm as a direction pointer.  We will see a student instruct the person to get on their knees, followed by the student point the muzzle of the firearm down to the ground.  Don’t use the firearm as a pointer!


The person most responsible for promoting this material is Craig Douglas in his excellent Armed Movement in Structures (AMIS) coursework.  While observing me teach a class a Managing the Don’t Shoot Yet class, he coined the term:


COMPLIANCE CREEP


This was a term designed to describe students who, upon obtaining compliance from the subject, began to creep or walk closer and closer to the subject.  We believe this happens because, subconsciously, the student wants to exert additional control over the subject and closeness implies control and because he or she felt safer due to the subject’s compliance.


We do not want to close the gap with the subject, unless absolutely necessary. We will discuss reasons to close the gap with the subject in Part 3 of this series.


To review: In an armed encounter with an apparently unarmed and complaint subject:


Ideally from a position of cover:


  1. Order the subject to stop movement:  DON’T MOVE.
  2. Order the subject to move his hands away from his waistline:  HANDS UP.
  3. Expose waistline and impair subject’s vision: REACH BACK AND GRAB THE COLLAR OF YOUR SHIRT, NOW PULL THE SHIRT OVER YOUR HEAD.
  4. Visually clear the subject’s entire waistline:  WHEN I TELL YOU TO MOVE, I WANT YOU TO TURN AROUND, SLOWLY, ONE STEP AT A TIME…DO IT NOW.
  5. Move the subject 540 degrees so the subject stops facing away from you.


The subject is now initially stabilized and we need to make a decision to either pin the subject in place and wait for assistance or move the subject.

In the next article we will discuss reasons for pinning or moving and detail instructions for each decision.


6 Comments

Filed under Managing the Don't Shoot Yet, Tactical Communication

IN EXTREMIS COMMUNICATION, PART 1

US_Navy_060114-N-9866B-002_Marines_assigned_to_the_11th_Marine_Expeditionary_Unit_(MEU)_fire_9mm_handguns_on_the_flight_deck_of_the_amphibious_assault_ship_USS_Peleliu_(LHA_5).jpgPhoto Credit:  “US Navy 060114-N-9866B-002

Managing the Don’t Shoot Yet

You Can’t Shoot Everyone


The word most often verbalized in shooting classes is “GUN!”  This is usually followed by a quick draw and center mass shot, hopefully!  We train to draw quickly and shoot.  We train to improve our split times.

In real world situations, do we ALWAYS shoot when we draw or shoulder our firearm?  Clearly the answer is no.  There are many situations where we may not yet have the legal or moral authority to shoot a subject but we do have the authority to have a firearm in our hand(s) and even point a firearm at a potentially threatening person.  In this series of articles we will examine the exact words to use and actions to take, when we encounter a person we need to control at gunpoint.

Most people can imagine a situation where they hear a noise in their house, arm themselves, and encounter an apparently unarmed individual in the living room. Is this person drunk and in the wrong house? Is he a thief? Or does he plan to murder your entire family?

In situations where we are unsure if the suspect has hostile intent or the subject has de-escalated (possibly he dropped a weapon when you turned the light on) we have have three choices:


1) Move them. Verbally instruct the subject to leave or move them to an area or place where they are positionally disadvantaged. Or:


2) Pin them in place. Verbally instruct them into a position of extreme positional disadvantage, allowing you dominance of the situation.


Of course, if the situation escalates and the individual becomes a lethal threat, at anytime, we could:


3) Decide the situation has risen to a level where deadly force is necessary and shoot to stop the subject’s aggressive actions.


The George Zimmerman shooting in Sanford, Florida; Michael Brown officer involved shooting in Ferguson, Missouri; and the Laquan McDonald officer involved shooting in Chicago, Illinois are still fresh in the media, the public, and court’s minds.

The potential consequences of shooting an unarmed person, regardless of the actual circumstances, can be costly: financially, psychologically, and emotionally.  Of course, the decision may also cost your freedom.

If we cannot shoot every person we encounter when we have our firearm in hand, how do we control them?  

Do you train to control a verbally compliant suspect? 

Do you have a plan?

Craig Douglas (Shivworks) does an excellent job breaking down and teaching in extremis communication in his Managing Unknown Contacts (MUC) block of instruction. Douglas believes this information is so vital to managing any potentially violent confrontation, he includes this block of instruction with almost every class he teaches.  

Douglas limits the verbal commands to orders which escalate in intensity, volume, and aggression, to stop the subjects forward motion and preserve distance between the unknown person and the student.  

The MUC subject matter context is an encounter with an unknown person in a situation or circumstance in which a physical assault is possible. The unknown person is moving towards the student.

The student may or may not be armed, but the students weapon is initially concealed and not apparent to the unknown person.

During this block of instruction the students quickly learn defending themselves under a “task load”, by participating in a conversation with the unknown person, severely slows reaction time.  

Students discover the unknown individual could use conversation to close the gap and bring himself within range to attack. 

Students quickly learn to limit verbalizations to pre­planned, brief, direct, and understandable orders.

Our communication during a critical event needs to be automatic, trained, clear, concise, and NOT involve dialogue with the subject.  Douglas’ Managing Unknown Contacts instruction gives the student a verbal “script” to use to stop an unknown person who is coming towards them.  This preserves the distance between you and the unknown subject which gives you time to make decisions and increases the time it takes the subject to attack you.

Our first priority when confronting a subject at gunpoint is exactly the same as MUCs objective: MAINTAIN DISTANCE.  We want the person to essentially freeze.

MANAGING THE DON’T SHOOT YET

Confronting a subject with a loaded firearm presents multiple challenges.

If the subject is verbally compliant and not an immediate deadly threat, you have to give them concise and understandable orders to make them do what you want them to.

Your mind is under a task load because you are evaluating the circumstances, moving and communicating with a loaded firearm, possibly considering the consequences of your actions and the safety of your family or other people in the area of the confrontation, possibly holding a flashlight, and dealing with physical and verbal actions from the subject.

This task load will slow your reaction time.

Additionally, this all may occur in low light, with background noise.

Added task loading may come as inquires from your significant other and kids screaming and crying. The subject you are controlling may also be shouting questions or statements.

All of this creates a confusing environment which does not allow for you to make quick decisive decisions, unless you have trained exactly what to do, under realistic pressure.

Chaotic dangerous situations are not the time to develop protocols to deal with the chaotic dangerous situation.

You must have an extensively trained a plan of action prior to the event.


STABILIZE THE PERSON AND SITUATION:


  1. The first objective should be to stop the subject’s movement.


We need to freeze the subjects motion so we can better evaluate the situation, preserve our distance from the individual, and evaluate if he will comply to verbal commands.

The most obvious way to stop the subject and evaluate if he is going to listen to verbal commands, is to issue a decisive verbal command.

In 2008, the Force Science Research Center at Minnesota State University, conducted an observational study to determine what commands, given by police officers, resulted in accurate compliance (http://www.forcescience.org/commandtypes.html).

A “COMMAND” was defined as any verbal communication, from a police officer, given to an individual, who was not another emergency service personnel and there was an expectation of a verbal or motor response from the individual.

Command types and subtypes were broken down to eight command types and two command subtypes.

Command types were: Regular, stop don’t, negative, indirect, question, interview, and other.

Command subtypes were designated as Alpha and Beta.

Alpha commands are considered commands in which a verbal response or movement response was appropriate and feasible.

Beta commands are commands which are vague and might cause difficulty with compliance.


ALPHA COMMANDS BETA COMMANDS
Put your hands on your head Get back
Drop the gun Move
Stop talking Stop
Don’t leave your vehicle Don’t
Don’t Move Don’t even think about it
Quit resisting Quit
Quit fighting Knock it off
Could you put your hands behind your back Could you calm down
What’s your name What’s going on


Between these command subtypes we see some commands which are more effective than others.

Beta Commands in action:
When I trained new detectives they would often phrase a command as a question in an effort to appear polite, to gain compliance.
In one incident, we had entered the home of a homicide suspect.  A brand new detective asked the suspect, “Could you come with us”? After some verbal resistance I told the suspect, “I need you to come with us”.
When asking a yes or no question we give the individual the ability to say no, even when we expect compliance.
Trying to be initially polite could lead to later conflict.  Asking an encroaching subject a question can continue the encroachment and initiate dialogue.
“I need you to come with me”.  Is clear and not a question.  If said in the correct tone and pacing, it sounds polite, but does not offer the individual a verbal out.
All of our in extremis commands should  be ALPHA commands


Our first objective
in Managing the Don’t Shoot Yet. Is to decide if the person we are confronting is an immediate threat. If we can positively determine the person is a threat we have an immediate shoot situation which does not require any communication before shooting.

For example, I wake up in the middle of the night to a loud crash.  I hear someone walking up my stairs.  I arm myself and from a position of cover, see an intruder walking up my stairs with a gun in his hand. I do not need to challenge him.   Easy decision to shoot.  I can articulate I felt in fear for my life and the life of my family.  Gunpoint.jpg

If we make the initial survey of the situation and are not SURE the intruder is an immediate threat our next objective should be to stop the subject movement. 

(Photo credit: Werner Vermaak)

The most clear, alpha command, which communicates our objective of stopping the suspect’s motion is “DON’T MOVE”.  This should be our first trained and ingrained command to a subject we are not going to immediately shoot.  Stopping them preserves range and allows us to visually evaluate the  circumstances and the surrounding area.  It also gives us a clear, binary, baseline to evaluate if the subject is compliant or not.  Does he continue to move after my command of Don’t Move?  Yes or no.  It gives me a reasonable baseline to describe my actions after the command is given.  If I tell someone to not move and they continue to move, I can reasonably articulate why they were threatening to me.

In future articles we will explore: Stabilizing the verbally compliant subject, pinning in place, and moving the verbally compliant subject.

20107847984_ef6128c70c_k.jpg

Larry Lindenman is a retired Illinois State Police Lieutenant. Larry was a SWAT instructor and Squad Leader, a Special Agent and investigative supervisor, and the Director of a multi-jurisdictional covert narcotics investigation unit.  Larry is a lifelong martial artist and currently instructs Brazilian Jiu Jitsu at the Carlson Gracie – Aurora Academy.

16 Comments

Filed under Managing the Don't Shoot Yet, Tactical Communication